What's Mail Merge? [use cases + tutorials]
Definition, use cases & step-by-step tutorials on Microsoft 365 and Google Editors.
![What's Mail Merge? [use cases + tutorials]](/_next/image?url=https%3A%2F%2Fcdn.hashnode.com%2Fres%2Fhashnode%2Fimage%2Fupload%2Fv1690382191513%2F2c7e47e1-4ffb-4933-83ed-db09f10007b3.png&w=3840&q=75)
Can you imagine being a VP at a large corporation and reaching out to each of your customers directly? Bankers or insurance associates do it all the time, and somehow, they manage to personalize each of the thousands of messages they send. Are they superhumans? Some might be, but most of them probably just use a good ol’ mail merge feature.
In today’s blog post, we’ll explain mail merge and all the peculiarities associated with it. We’ll also provide tutorials on creating a mail merge in MS Office, Outlook, Google Docs Editors, and Gmail. So, let’s get started!
What is mail merge?
Mail merge is a method of building personalized letters, documents, or emails with a bit of automation. Components of mail merge include:
A template of a letter or an email with specific placeholders in the body, and
A spreadsheet with a set of data that should replace placeholders for each individual recipient. These can be names, addresses, or any other custom data. Some tools even allow for sending individual attachments with emails.
A mail merge functionality combines these two components into one piece – a personalized message with data relevant to you and you only.
Mail merge example
Very often, when you receive a letter from a company or an institution, you’ll see your name and address printed on it. It will often start with “Dear John,” unless your name is Suzie, then you’re likely to see “Dear Suzie.” In the body, you’ll find some seemingly personalized references to your actions or further mentions of your personal details. In many languages, you’re likely to see gender-specific expressions.
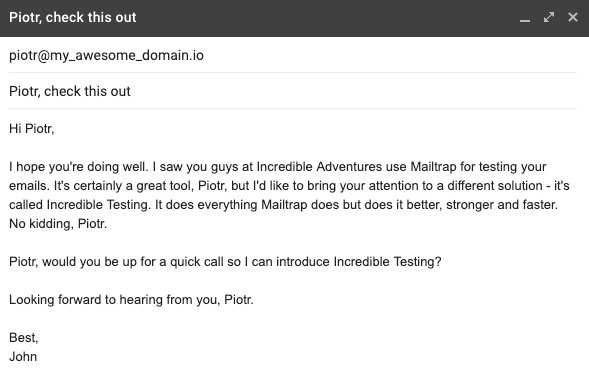
The same goes for emails. Whenever someone reaches out trying to sell you something, their email will probably look like this:
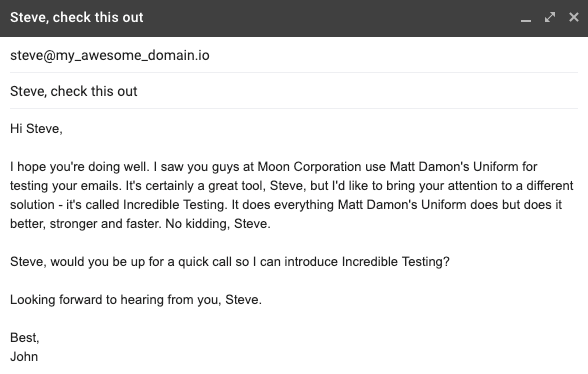
Another email from this series would look something like this:
And it can go on for thousands of emails sent within just minutes. No one would bother writing each of these emails and inserting details one by one. Instead, they delegate these mundane tasks to mail merge. At the same time, since the emails look fairly personal, they have a higher chance of convincing a recipient to take the desired action.
The data source for such emails would be similar to this:
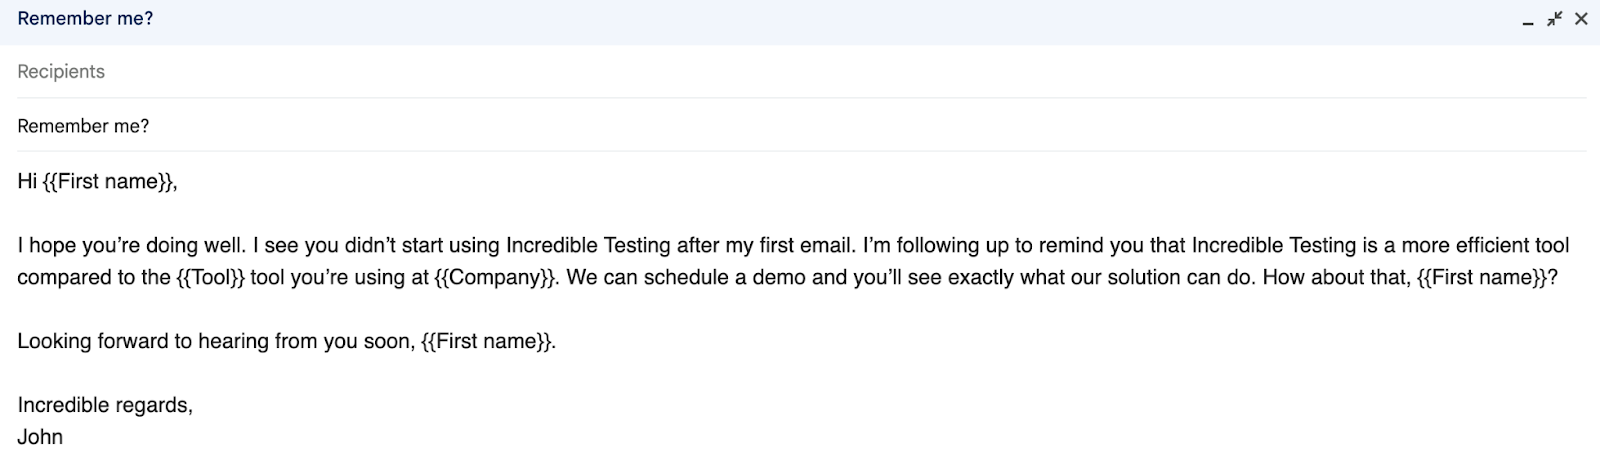
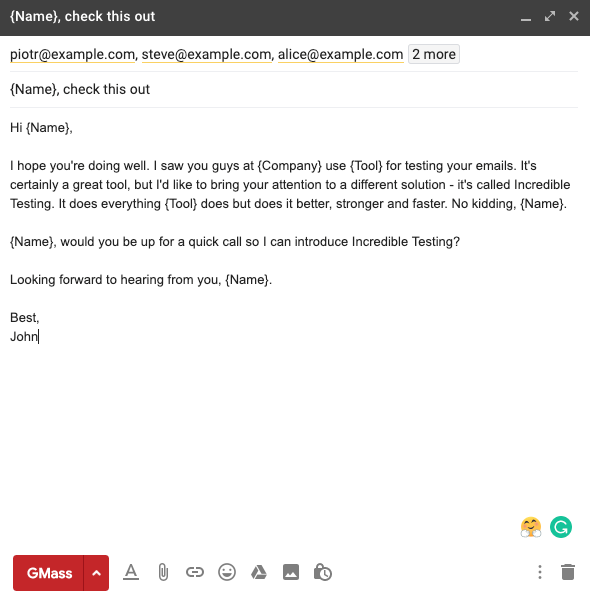
While the raw text i.e. the template will have the following structure:
What are the use cases for mail merge?
Mail merge has been in use for many years, even before the internet changed how we do many things. It’s omnipresent both in offline and online worlds. Typically, it’s used whenever it’s necessary to combine a form letter with personalized variables.
The most common mail merge use cases include:
Emails – usually used for mailing large recipients lists. With mail merge, you can create an email template and personalize variables by inserting the required information from a data source;
Paper letters – used for snail mail. The contents, designs, and fonts will be the same throughout the letters, while the names, postal addresses, greeting lines, and other variables will be personalized. Once the data is merged, you can print your letters and mail them to the recipients.
Envelopes, print labels, and address labels – similar to paper letters, you can also create a bunch of envelopes, print labels or mailing labels, and address labels with custom data. These are particularly useful if you’re sending packages to your customers.
Directories – used for creating directories, catalogs, or lists of customers. Mail merge allows for combining different types of data sources into a single new document.
Which tools to use for mail merge?
If you’re using Microsoft Word, Excel, Google Sheets, or Google Docs, you can easily send emails from Gmail or Outlook. However, the mail merge process can be a bit limited with direct methods (for example, you can’t add attachments or Cc/Bcc fields). Instead, you can opt for various add-ons that will make your life easier and provide access to more functionalities. Here are the most popular user choices:
GMass – a popular plugin for Google Chrome that comes with mail merge capabilities. And it does much more than that. Not only can you quickly set up personalized emails to your recipients, but you can also schedule them to be sent at a specific time and set up automatic follow-ups to be sent if no reply is received. GMass also allows for tracking opens and clicks, so it makes a pretty decent cold email platform.
Mailmeteor – another popular plugin that offers a chance to personalize emails and send even 2,000 of them in a single day. Like the previous entry, it works with Gmail and comes with email tracking functionality. On top of that, each email can be previewed to avoid any trouble (and trust us, errors do happen).
Mail Merge Toolkit – a Microsoft Office add-in that enhances Outlook, Word, and Publisher with mail merge capabilities. It allows you to send RTF or HTML emails with attachments. At the same time, Mail Merge Toolkit reduces the chances of receiving false responses.
YAMM – not just Yet Another Mail Merge. As the creators claim, it’s “the world’s most popular Google Sheets add-on for Gmail and G Suites users”. It comes with all the features of the other tools, such as email tracking and scheduling. Users can also use mail merge with individual attachments. And there are a bunch of advanced features, such as individual, clickable links, or pre-filled forms.
Easy Mail Merge is also a similar tool that, to no surprise, is used for mail merge in Microsoft Outlook. It comes with a standard set of features for personalizing and scheduling emails. Its users can take advantage of automated scenarios to send personalized messages without any interference.
What’s interesting is that some of the tools we mentioned also offer support for cc and bcc fields. This can prove especially useful for salespeople out there. Frequently, they send mass campaigns to hundreds of leads at the same time. Rarely, though, there’s just one account manager responsible for each of these prospects. With cc/bcc in mail merge, they can add respective managers and/or their team leaders only to specific emails.
Updating the data source we showed earlier:

Mike as a team leader could be bcc’ed on multiple emails (invisible to customers) while the rest of the crew would be split between emails and placed in the cc fields. Each plugin would add the right contacts to the right fields. Awesome, huh?
Most, if not all, platforms for sending mass emails (such as email marketing platforms or transactional email providers) also offer mail merge. They might not refer to this feature with the same name. Instead, you might find references to custom or dynamic fields or even to snippets. Regardless of the naming, it’s all pretty much the same thing. Often, the functionality can also be replicated with various APIs without any trouble.
Should I use a plugin or a platform for mail merge?
The choice of an online tool for mail merge really depends on your use case. If you’re more of a casual sender and don’t send more than 50-100 emails a day, you’ll probably be better off with a simple plugin. This way, you can get everything you need in a simple interface, sometimes even without extra expenses. We introduced some of the Gmail add-ons and Outlook add-ins above, but you can also find tools for other popular email clients.
If you, however, send newsletters, transactional emails, or other forms of mass emails – then you’ll need more than that. Email clients enforce strict limits on sending volume and offer minimal capabilities.
Plus, sending thousands of emails from free email accounts or even Google Workspace will look suspicious to spam filters. These accounts don’t provide access to DNS records, dedicated IPs, or scalable email infrastructure. In other words, you have limited control over your email deliverability.
So, it’s a much better idea to use a dedicated marketing platform or a transactional provider. As mentioned, nearly all of them offer mail-merge-like functionalities to personalize your emails quickly and accurately.
For example, Mailtrap Email Sending has a template feature that operates on the handlebars engine. While it’s not your typical mail merge, its operation is quite similar. The template includes placeholders and the values are called with API. And instead of the Excel spreadsheet, you have a JSON object that stores your data.
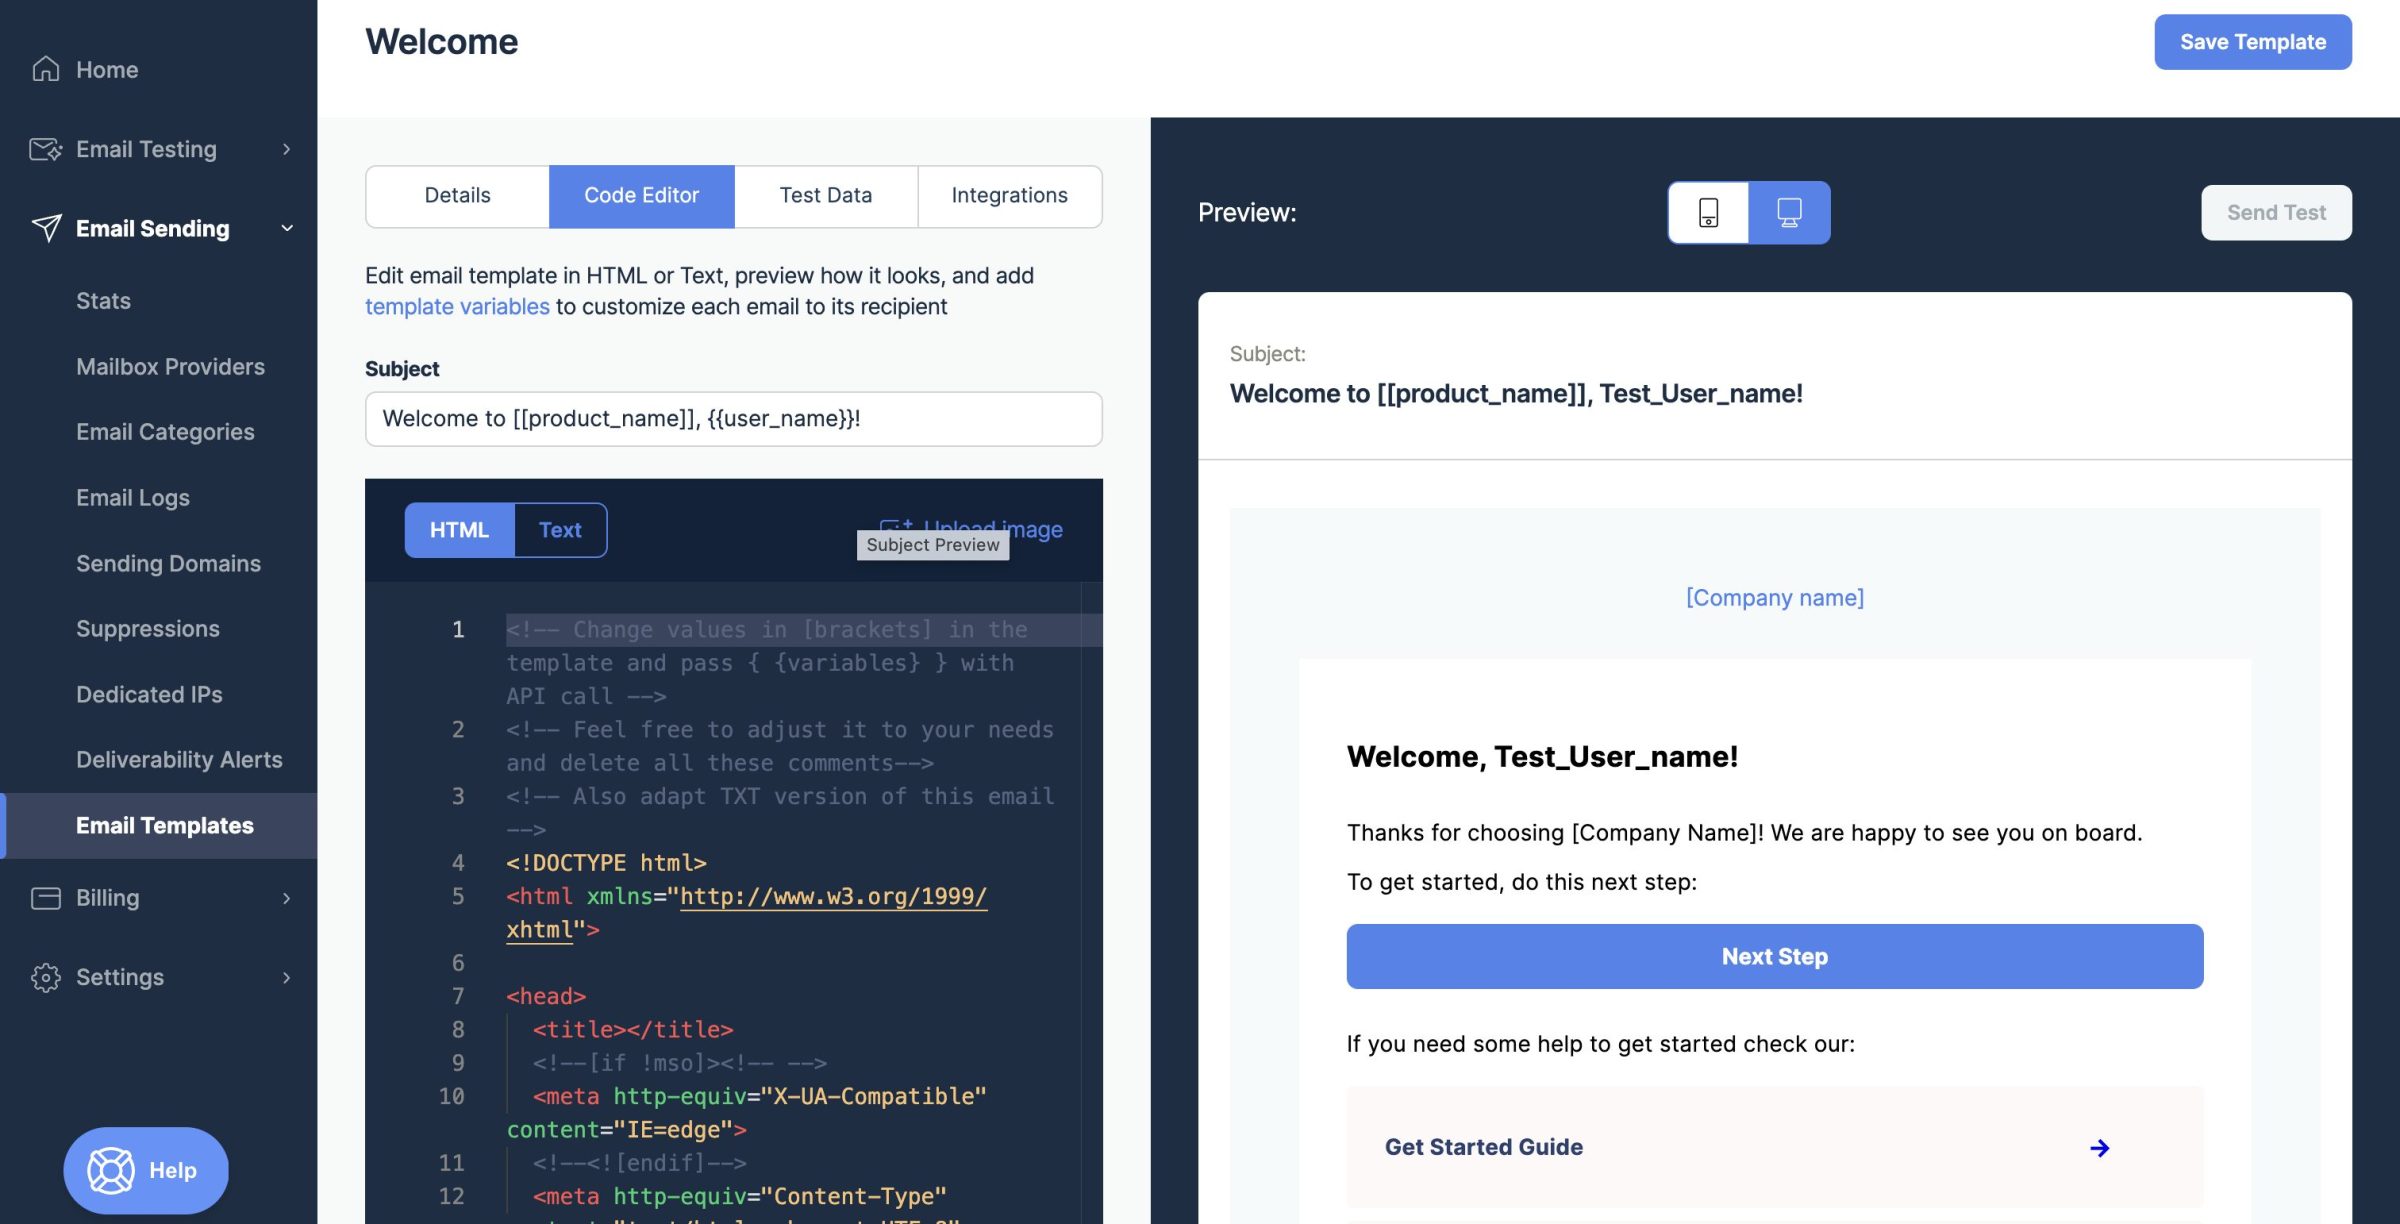
Templates are a more reliable and accurate way to personalize your emails. While mail merge is a useful feature, it has a fair share of disadvantages. It lacks customization options and leaves wiggle room for errors. By storing the templates within Email Sending’s platform and referencing them through API, you can stay assured that your emails will be personalized properly. And you’ll also deliver emails right into your recipients’ inboxes. Learn more about handlebars here.
Other features of Email Sending include actionable analytics with drill-down reports, RESTful API and SMTP service, email logs, a sending throughput of up to ~10,000 emails/second, dedicated IPs, auto IP warmup, and suppression lists available to users after a straightforward setup/migration process.
Email Sending is part of Mailtrap Email Delivery Platform. To learn more about how to use it, check out the video below:
How to create a simple mail merge for emails
Now let’s see how to use mail merge feature in Microsoft Office and Google Docs Editors.
Microsoft Word with Microsoft Excel as a data source
To send bulk personalized emails with mail merge, you’ll need a word processing software i.e. MS Word, MS Excel, and a mailer such as Outlook or Gmail. Keep in mind that you should have Outlook as a default email program to be able to merge to email directly from Word.
1. Open the Word document and create an email template you want to use. Type the body of the message and skip the variable data you want to personalize;
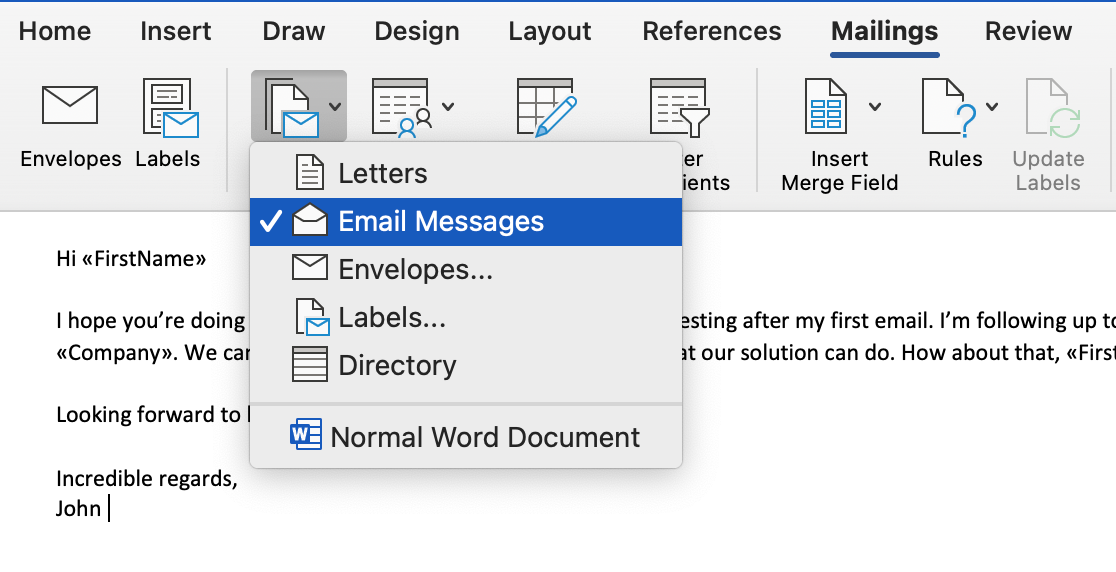
2. Now go to the Mailings tab, click Start Mail Merge, and select Email Messages. Depending on the Word version you’re using, you may see an additional field called Step-by-Step Mail Merge Wizard… You can select this if you prefer a guided setup.
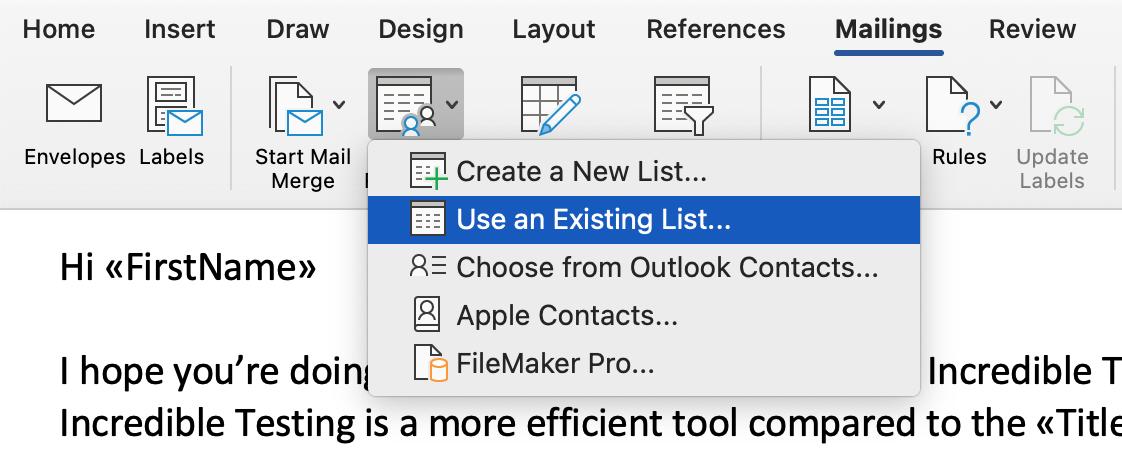
3. Press Select Recipients. Here, you can either create a new list or use an existing one. The mailing list will be your data source. We’ll be using the list of recipients in Excel spreadsheet we referenced earlier, so we’ll choose Use an Existing List… from the dropdown menu.
4. Upload your data source. Choose if you want to upload a particular sheet or an entire workbook. Keep in mind that you should group all your recipients on the same sheet. If you want to, you can also press Edit Recipients List to edit your contacts list. It will open the mail merge recipients dialog box in which you can find duplicates, filter desired recipients, set conditions, or add/remove entries in the source.
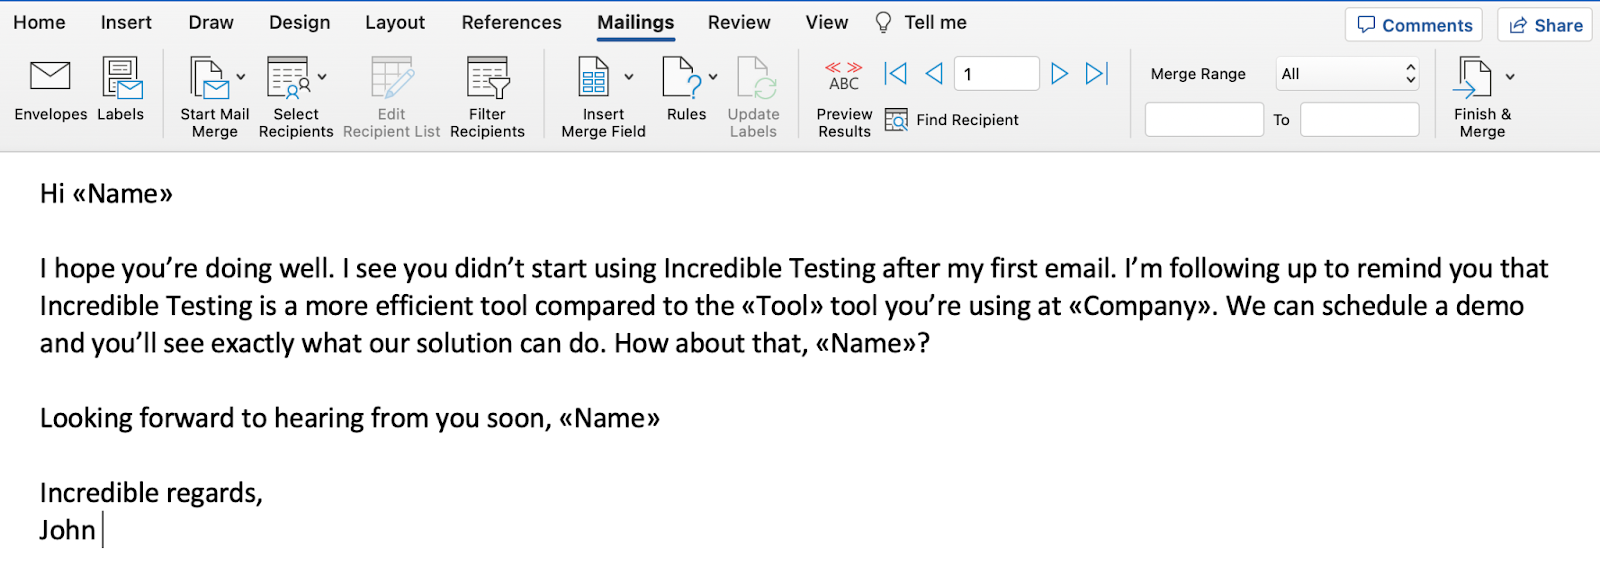
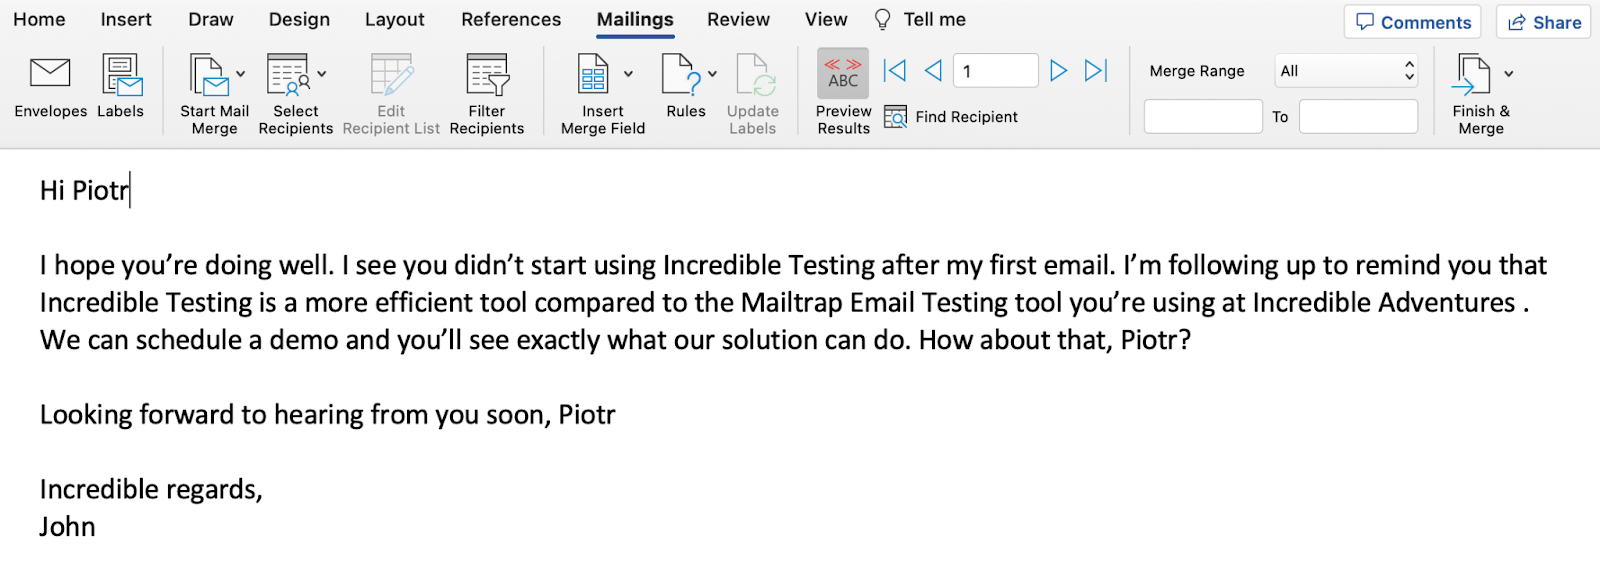
5. Now it’s time to insert placeholders in your main document. Press Insert Merge Field. In the dropdown menu, you’ll see the variables you defined in the Excel spreadsheet. You can also use the Match Fields located in the Write & Insert Fields section. That way, you’ll match the merge fields in your current document to the fields in your data source. Once you’re done, you can format the email body the way you want.

The finished email should look something like this:
6. Press Preview Results to see what your merged emails will look like. In case any of the variables are incorrectly defined or don’t exist in the data source, you’ll see an error message during the preview. Click the left and right arrow buttons to look through each email. Press Preview Results again to exit the preview mode and make any necessary changes if needed.
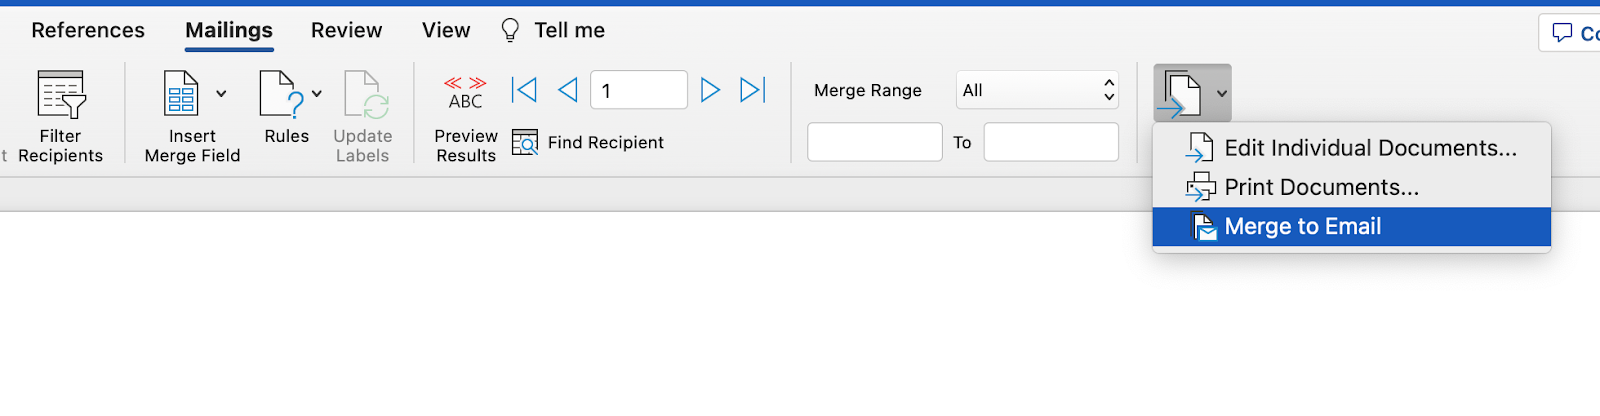
7. When you’re happy with your emails, click Finish & Merge. Choose Merge to Email.
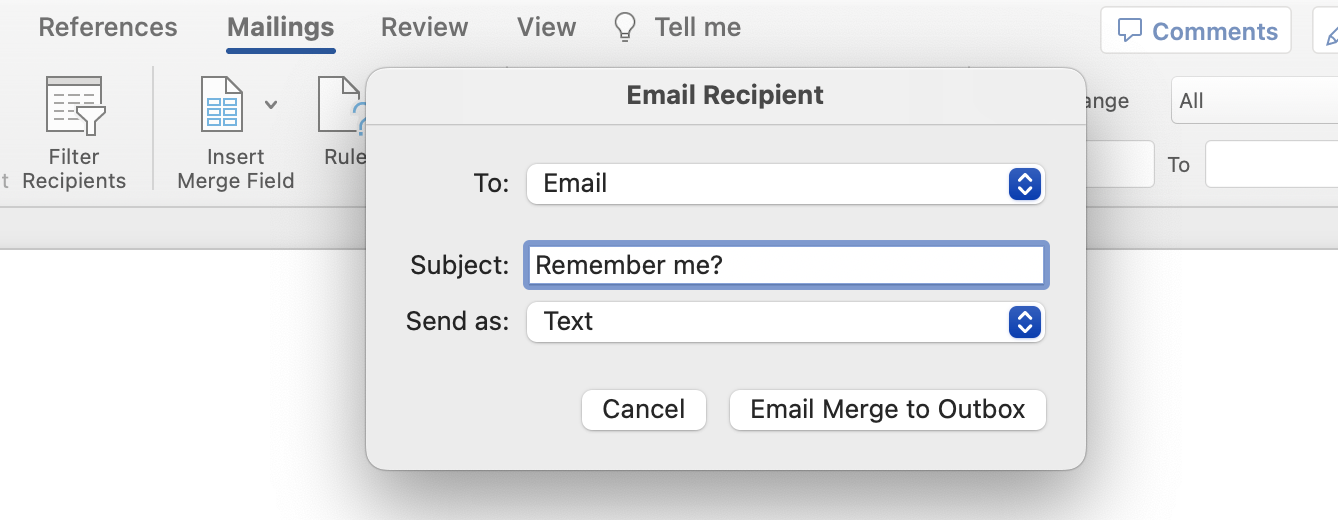
8. Define the To (choose Email to send messages to the recipients in your address list), Subject, and Send as fields. Press Email Merge to Outbox once you’re done.
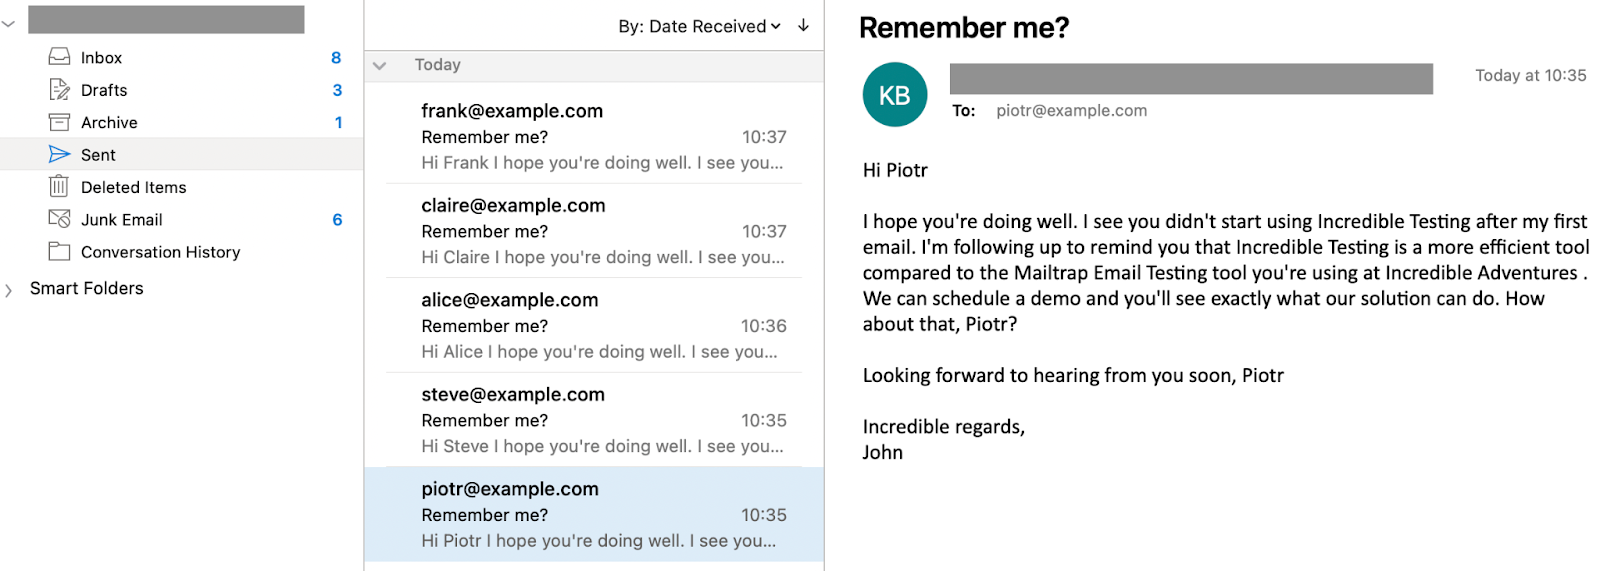
Within seconds, you’ll find the emails in your Sent folder.
Microsoft Word with Microsoft Outlook contacts as a data source
The mail merge process looks quite similar when you use Outlook contacts as a data source. Yet some parts of mail merge are still different.
The first two steps are similar to what we’ve already described. So, let’s skip them here.
1. Press Select Recipients and click Choose from Outlook Contacts…

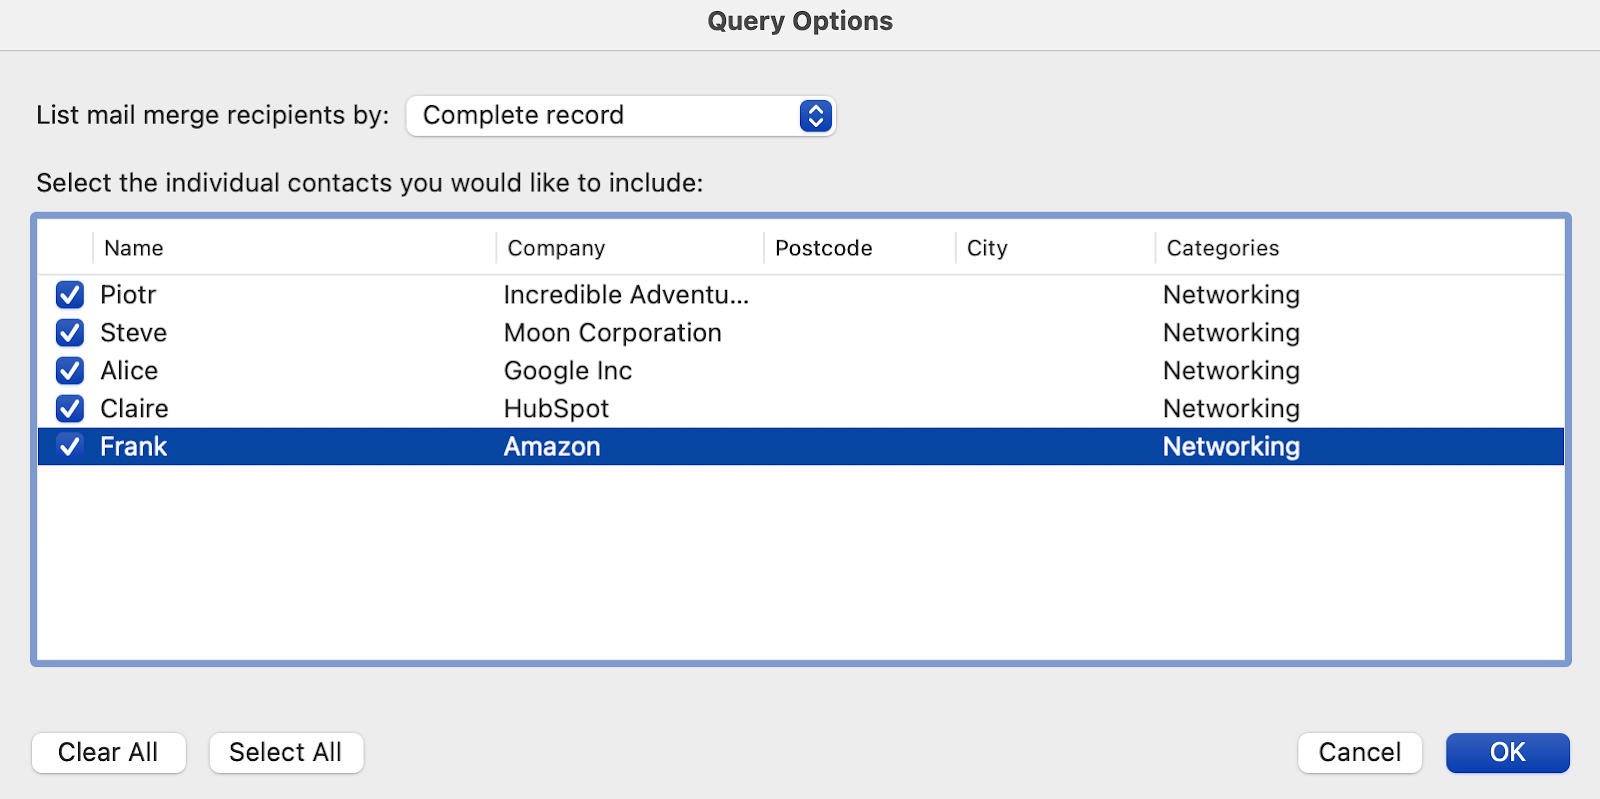
2. If you don’t want to email all the contacts, press Filter Recipients and filter your contacts by category or manually. Click OK.
3. Then go ahead and insert merge fields. Make sure the field names you pick exist in the data source.
4. Next, preview your emails, and if everything looks good, hit Finish & Merge and choose Merge to Email the way we did in the previous section.
For more information on mail merge in Microsoft products, we have a dedicated guide, or you can also refer to Microsoft documentation.
Gmail with Google Sheets as a data source
Google Workspace doesn’t have a native mail merge feature. So, you have three options if you want to enable this feature: use Google Docs or Google Sheets API, an App Script, or an add-on.
Today, we’ll detail how to create a mail merge for Gmail and Google Sheets using the App Script.
Unlike Microsoft 365, you don’t need a word processor to complete the mail merge. Instead, we’ll create a template in Gmail, populate Google Sheets with recipients’ names and addresses, and use App Script project to personalize and send emails.
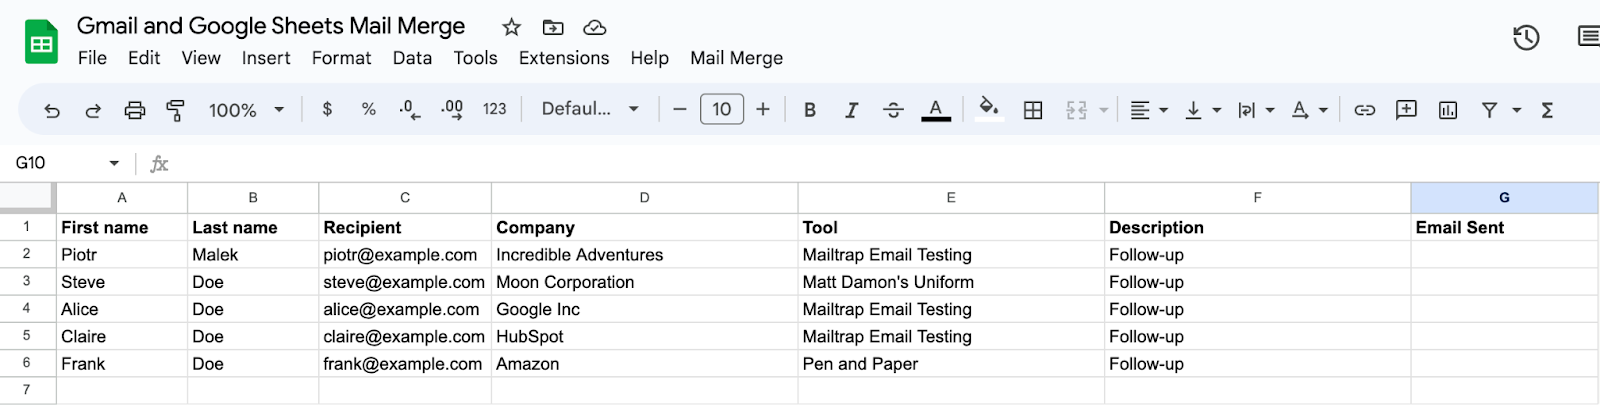
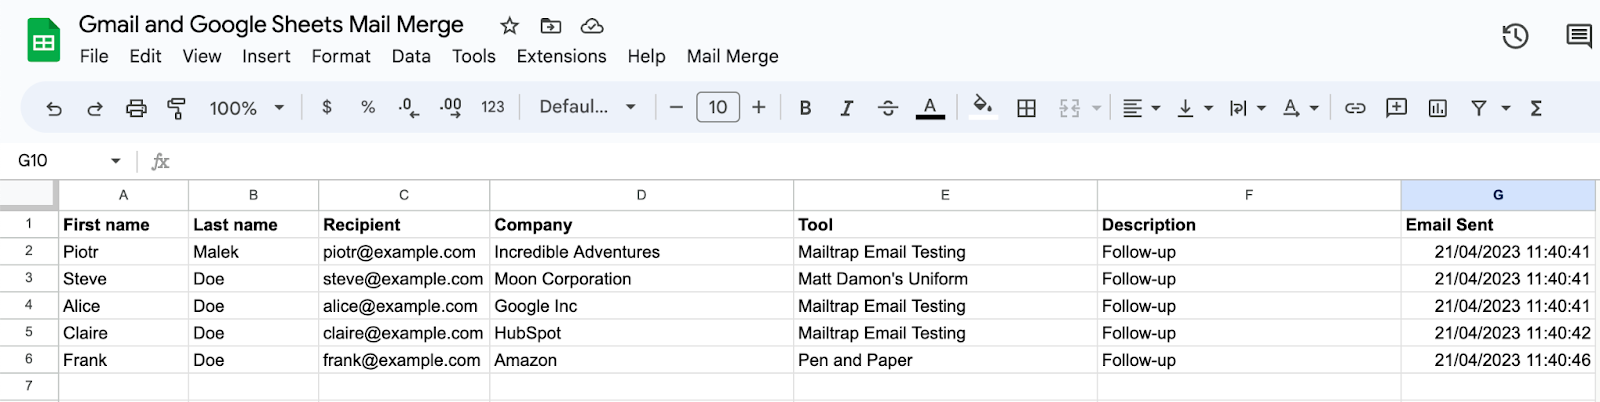
1. Create a Google spreadsheet and insert the data you want your emails to be personalized with. Or use an existing document/sample provided by Google. If you’re doing mail merge for the first time, we recommend using the sample as it has an App Script project attached to it and a mail merge feature enabled. You can find it here.
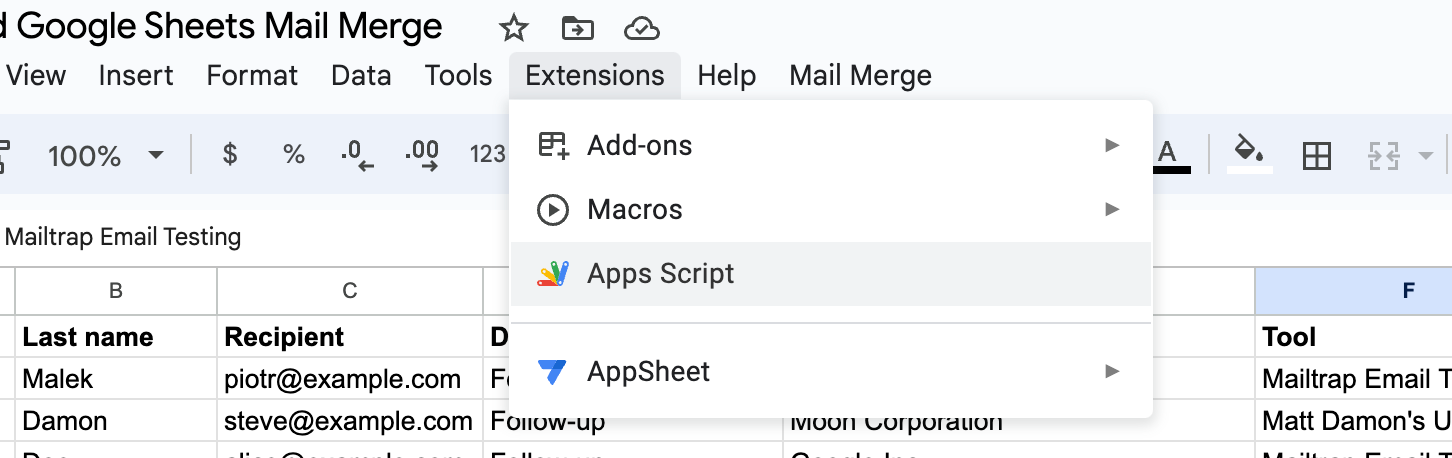
2. Click Extensions and then App Script to open the project and make the changes (if any).
3. Go to your Gmail account and create an email draft. Populate the text with accurate placeholders and use double curly braces {{}} to separate them from the text. Make sure you use the exact merge field names that you have in your Sheets. Copy the subject line.
4. Go back to your data file i.e. spreadsheet and then click Mail Merge → Send Emails.
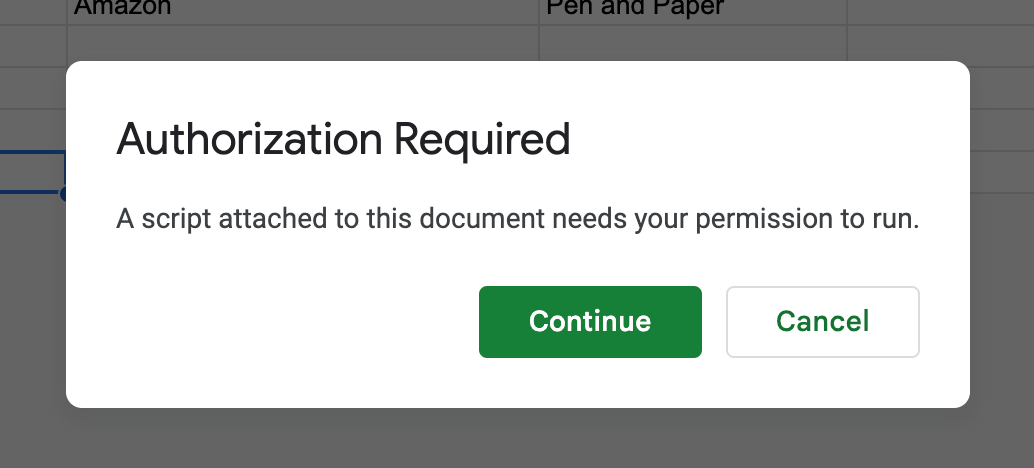
5. Authorization window will appear. Click Continue and sign into your Google account.
6. At this point, Google hasn’t verified this app window might appear. Click Advanced → Go to {project name} unsafe and give the G sheet access by clicking Allow.
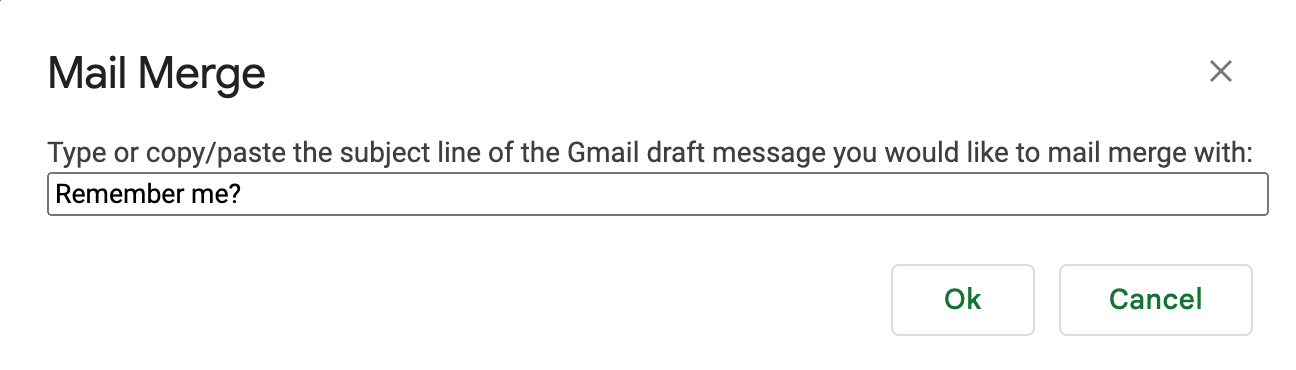
7. Go back to the spreadsheet and click Mail Merge → Send Emails once again. Mail merge window will pop up, asking you to insert the subject line of the draft we copied earlier. Press Ok.
8. If you did everything correctly, the emails will be sent to the intended recipients. You’ll see the timestamp in the Email Sent field in the Sheets. You’ll also find them in your sent folder.

Keep in mind that you can’t preview your emails before sending them to the recipients. But you can modify the App Script, which gives you more flexibility. Refer to the Google documentation for more details.
You can check out this guide if you want to use mail merge in Google Docs to create a form letter within a single merged document. For a step-by-step tutorial on mail merge in Gmail and Google Editors, read this blog post.
Alternatively, you can install add-ons that will enable you to mail merge directly from Google Docs or Gmail.
Test your mail merge setup with Mailtrap Email Testing
Last but definitely not least – don’t forget to test your mail merge emails before they’re sent to customers.
Why? Well, there is a big chance that you have personally received (probably more than once) an email with a {NAME} placeholder that somehow didn’t fetch the right data.
For salespeople, this could jeopardize a chance of striking a major deal. For others, this could ruin a good first impression and completely distract recipients from a call to action.
The good news is that some platforms/tools that do offer mail merge also offer features for previewing emails before they’re sent. But, if you are a user of a platform/tool that does not, or simply skip the previewing process altogether, then you will only find out if something is wrong with your email when it’s already too late.
So, to prevent such a situation, make sure you use a dedicated tool for testing emails.
Mailtrap Email Testing is a safe environment for testing. It’s another portion of the Mailtrap Email Delivery Platform.
With Email Testing, you can inspect and debug emails in a staging environment without the risk of spamming recipients. It captures all the SMTP traffic within a virtual inbox and leverages a fake SMTP server.
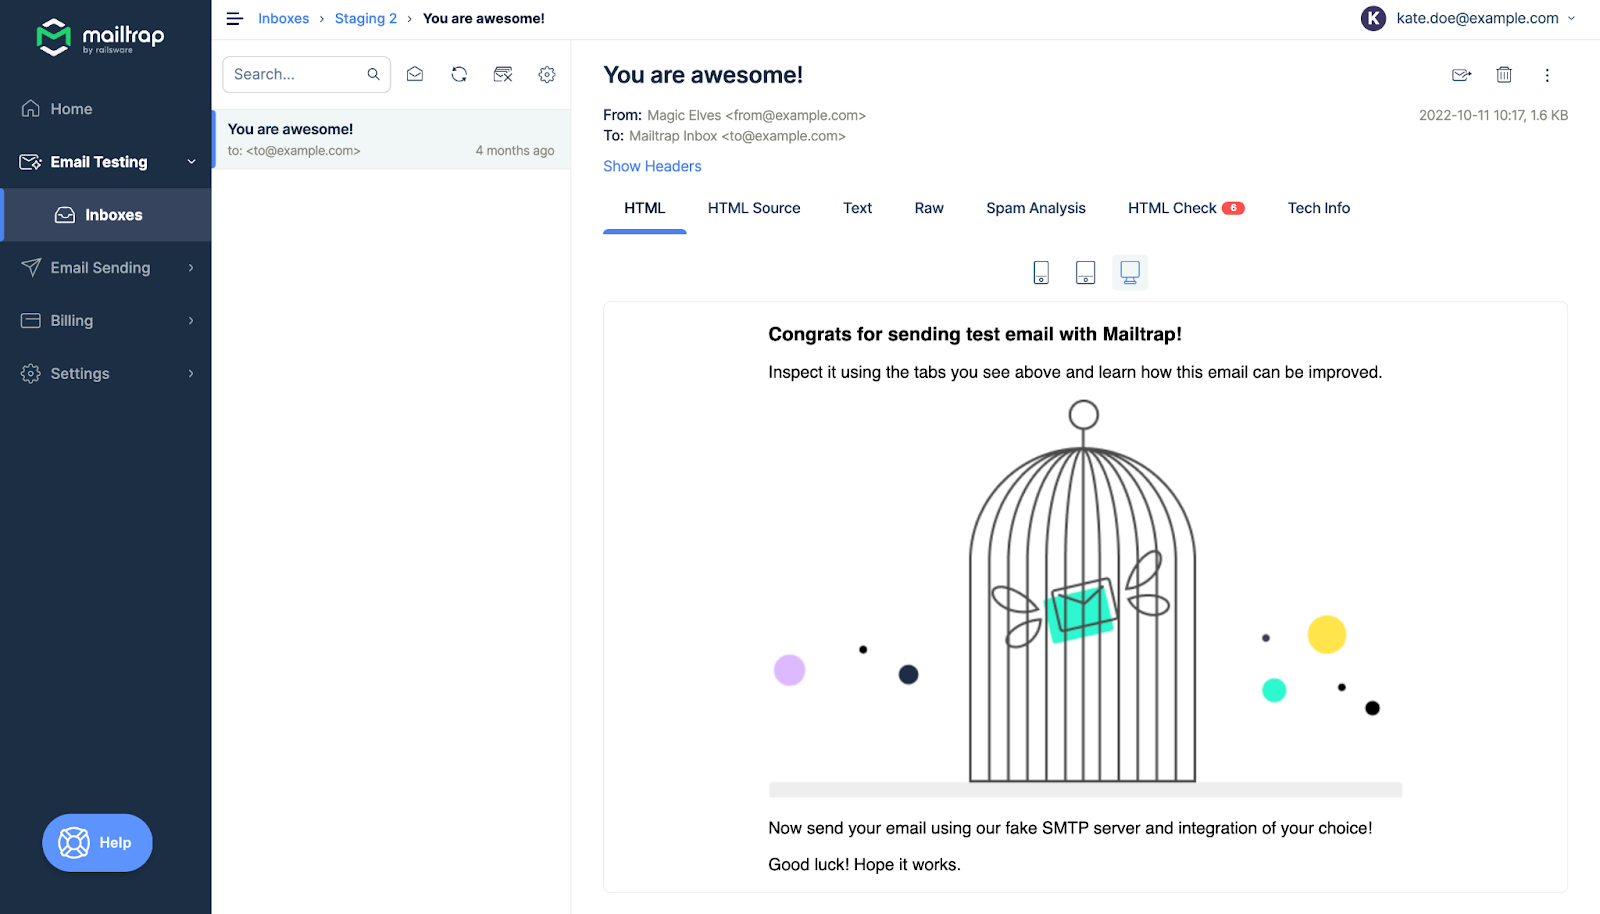
Email Testing is easy to set up with its SMTP credentials, ready-made code snippets, and SDKs for different programming languages. With its help, you can preview your emails to see how various mailbox providers render the HTML content. You can also view tech info with transaction details and header values, check the spam score, and forward emails to real inboxes manually or automatically.
These features will be particularly handy for testing your mail merge emails. That way, you’ll never send ‘Dear {First_name}’ emails to your recipients.
Easy, no? 🤓 I hope this was helpful!
Oh, and if you want to start testing with Email Testing or check out our other guides, visit the Mailtrap blog and tell us your feedback in the comments!
![All things Email Bounce [+ best practices]](/_next/image?url=https%3A%2F%2Fcdn.hashnode.com%2Fres%2Fhashnode%2Fimage%2Fupload%2Fv1692636303019%2F6301ed13-8803-4e0a-ab31-defff7fa8ab3.png&w=3840&q=75)